We may earn a commission from links on our site, but this doesn’t affect our reviews. Learn more.
Hedge With Crypto is an independent publisher that provides objective and free content. Articles on our site may include links to our partners. If you click on these links, we may earn a commission. However, our editorial content remains unbiased, reflecting our own opinions or the general information available. For more information on our company policies, read the Affiliate Disclosure, Privacy Policy, and Terms & Conditions.
SeedSigner Review
Seedsigner is a do-it-yourself (DIY) air-gapped cryptocurrency hardware wallet. The device is highly secure as it features no external connectivity. However, less experienced investors could find Seedsigner difficult to use due to its DIY nature.
Hedge With Crypto aims to publish information that is factual and accurate as of the date of publication. For specific information about a cryptocurrency exchange or trading platform please visit that provider’s website. This information is general in nature and is for education purposes only. Hedge With Crypto does not provide financial advice nor does it take into account your personal financial situation. We encourage you to seek financial advice from an independent financial advisor where appropriate and make your own enquiries.
TABLE OF CONTENTS
Our Take
Bottom line:
A SeedSigner is a great tool for serious Bitcoin investors. It's simple to use once built, and its air-gapped nature makes it excellent for adding further protection to your Bitcoin wallet. However, due to it needing to be linked to external software, only supporting a single asset, and being comparable in price to a Ledger or Trezor, we can recommend the device to those solely investing in Bitcoin.
-
Trading Fees:
N/A
-
Currency:
N/A
-
Country:
Worldwide
-
Promotion:
None available at this stage
How We Rated the Seedsigner Wallet
| Category | Hedge With Crypto Rating |
|---|---|
| Features | 4 / 5 |
| Supported Cryptocurrencies | 1 / 5 |
| Pricing | 4 / 5 |
| Ease of Use | 3 / 5 |
| Customer Support | 3.5 / 5 |
Pros Explained
- Air-gapped – One of the largest benefits of using a SeedSigner is that the device is air-gapped, preventing network-based attacks. As such, a SeedSigner could be ideal for security-conscious Bitcoin investors.
- No risk of supply chain attack – Because you can buy the components to build a SeedSigner, the device is not susceptible to supply chain attacks which involve a bad actor flashing compromised software to a crypto wallet during transport. Therefore, the device offers additional peace of mind to investors.
- Customizable – While every SeedSigner requires the same basic components, you can choose or create unique shells or buttons, providing a greater sense of customizability versus other hardware wallets. Furthermore, you can opt for a bare-bones build to acquire a secure Bitcoin wallet at a price matching your budget.
Cons Explained
- Difficult to set up. While you can purchase a pre-assembled SeedSigner, most users are likely to opt for the cheaper DIY version. Therefore, there is some initial setup required before the device is usable. We tested the build process for our SeedSigner review and found that while simple, it was fairly tedious, which could dissuade some users.
- Can only store Bitcoin. Unfortunately, a SeedSigner can only store Bitcoin (BTC). As such, investors looking to secure a wide variety of altcoins on a single device would be better served by another cold wallet, like a Ledger Nano X.
SeedSigner Compared and Alternatives
While Seedsigner is a great Bitcoin wallet, other options may be better tailored to your needs. Below, we've summarized a few of the best hardware wallets on the market today.
| EXCHANGE | CRYPTO ASSETS | TRADING FEES | RATING | PROMOTION | WEBSITE | REVIEW |
|---|---|---|---|---|---|---|
|
|
5,550+ |
0.25% for swaps |
Rating
We provide an overall weighted average rating out of 5 stars. Our ratings are based on objective criteria like the ease of use, fees, deposit methods, customer support and availability. Our reviews are not influenced by 3rd parties. Click here for further information about our rating methodology and a full list of categories we review against. 4.7 / 5 |
None available at this time |
Visit Ledger Wal… | |
 Trezor One Trezor One
|
1,300+ |
1.8% to 3.6% for credit card purchases |
Rating
We provide an overall weighted average rating out of 5 stars. Our ratings are based on objective criteria like the ease of use, fees, deposit methods, customer support and availability. Our reviews are not influenced by 3rd parties. Click here for further information about our rating methodology and a full list of categories we review against. 4.2 / 5 |
None available at this time |
Visit Trezor One | Trezor One Revie… |
|
|
5,500 |
N/A |
Rating
We provide an overall weighted average rating out of 5 stars. Our ratings are based on objective criteria like the ease of use, fees, deposit methods, customer support and availability. Our reviews are not influenced by 3rd parties. Click here for further information about our rating methodology and a full list of categories we review against. 3.9 / 5 |
None available at this time |
Visit Keystone | Keystone Review |
SeedSigner At a Glance
Founded in 2020, a SeedSigner is a DIY hardware wallet for Bitcoin. The project aims to provide a secure way for people to store their assets without relying on a company like Ledger that must comply with governmental requests.
| Wallet Name | SeedSigner |
| Price | $80 |
| Features | Air-Gapped, Custom Seed Generation, Power-Only USB |
| Accepted Fiat Currencies | Various Based on Vendor |
| Payment Methods | Credit/Debit Card, Crypto |
| Supported Cryptocurrencies | Bitcoin only |
| Customer Support | Video Guides, Telegram, Twitter, GitHub Email, |
| Security Measures | Air-Gapped, DIY, Power-Only USB |
| Mobile App | No |
Review of SeedSigner's Top Features
Air-Gapped Wallet
The main attraction to a SeedSigner wallet is its air-gapped nature. To maximize security, the wallet cannot be connected to the internet, Bluetooth, or any similar form of wireless connectivity. Compared to hot wallets (internet-connected crypto wallets), verifiably air-gapped devices are far more secure, making them ideal for investors looking for the best way to protect their assets for long-term storage.
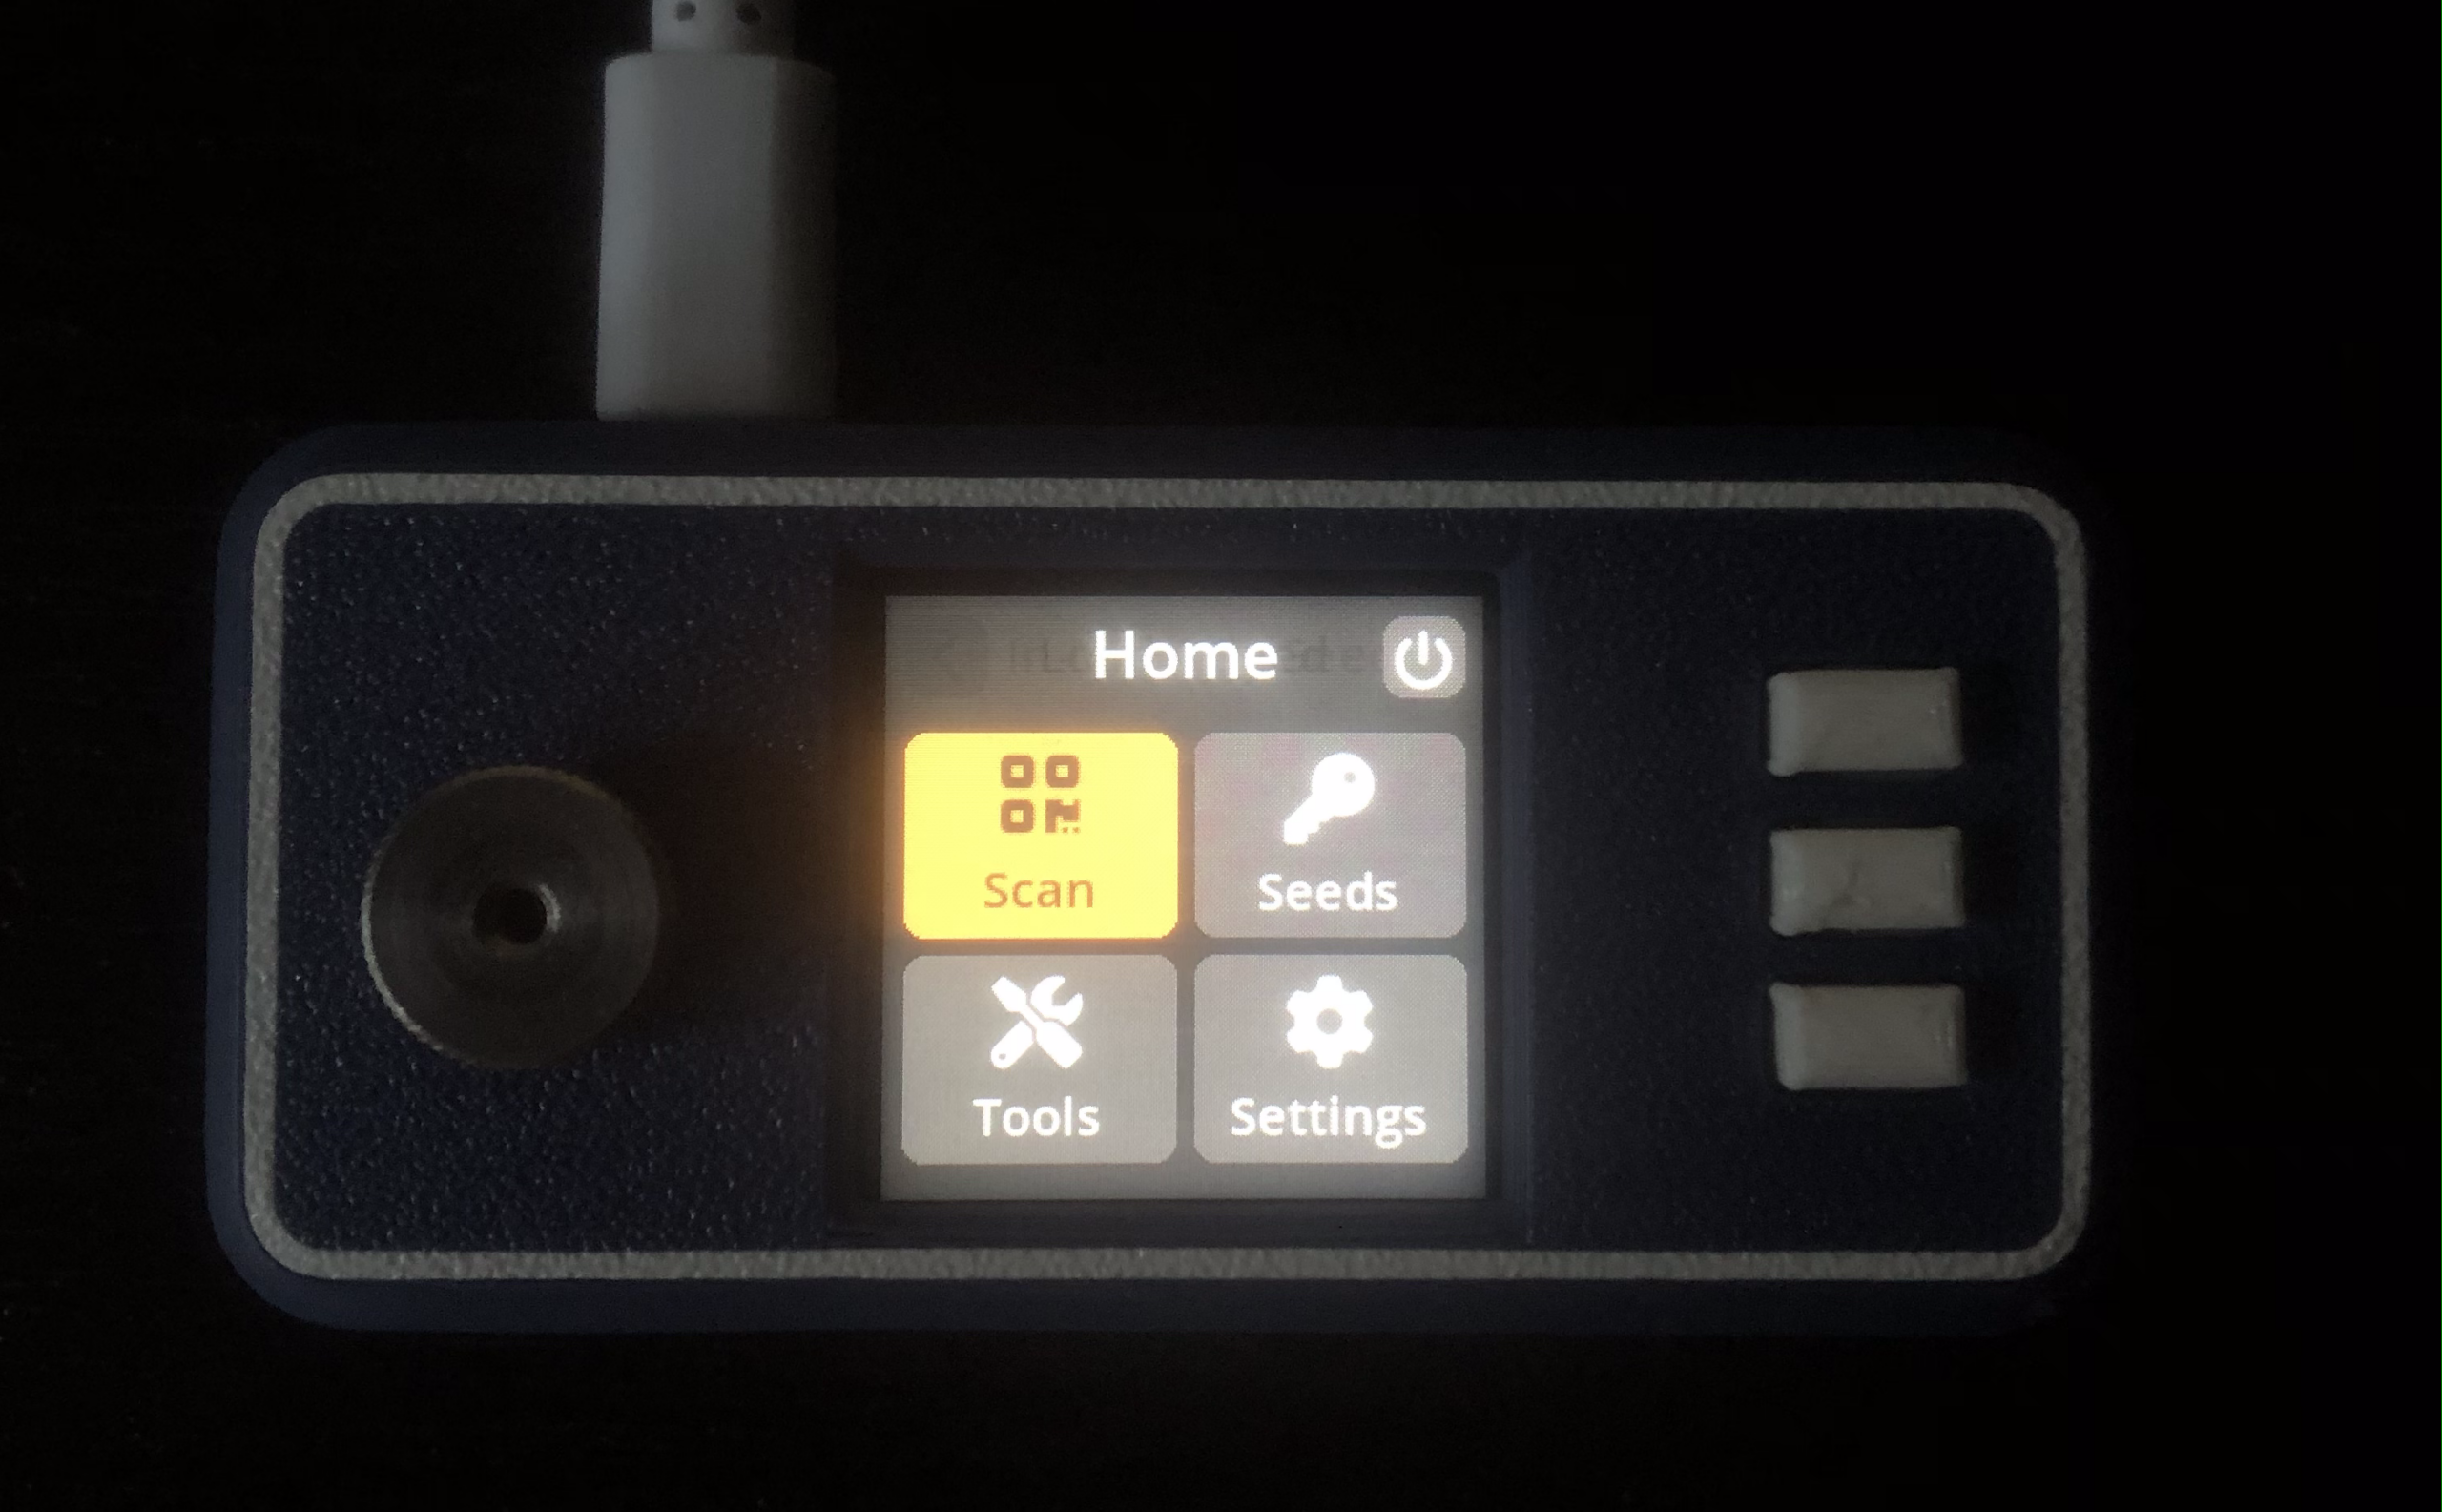
In the case of SeedSigner, the wallet uses a camera to scan QR codes to send transactions. As QR codes are unique and an excellent way of sending information between computers, sending and receiving transactions is almost as simple as traditional wallets. However, it does reduce portability as you'll need a screen to scan the QR code on for the device to be effective.
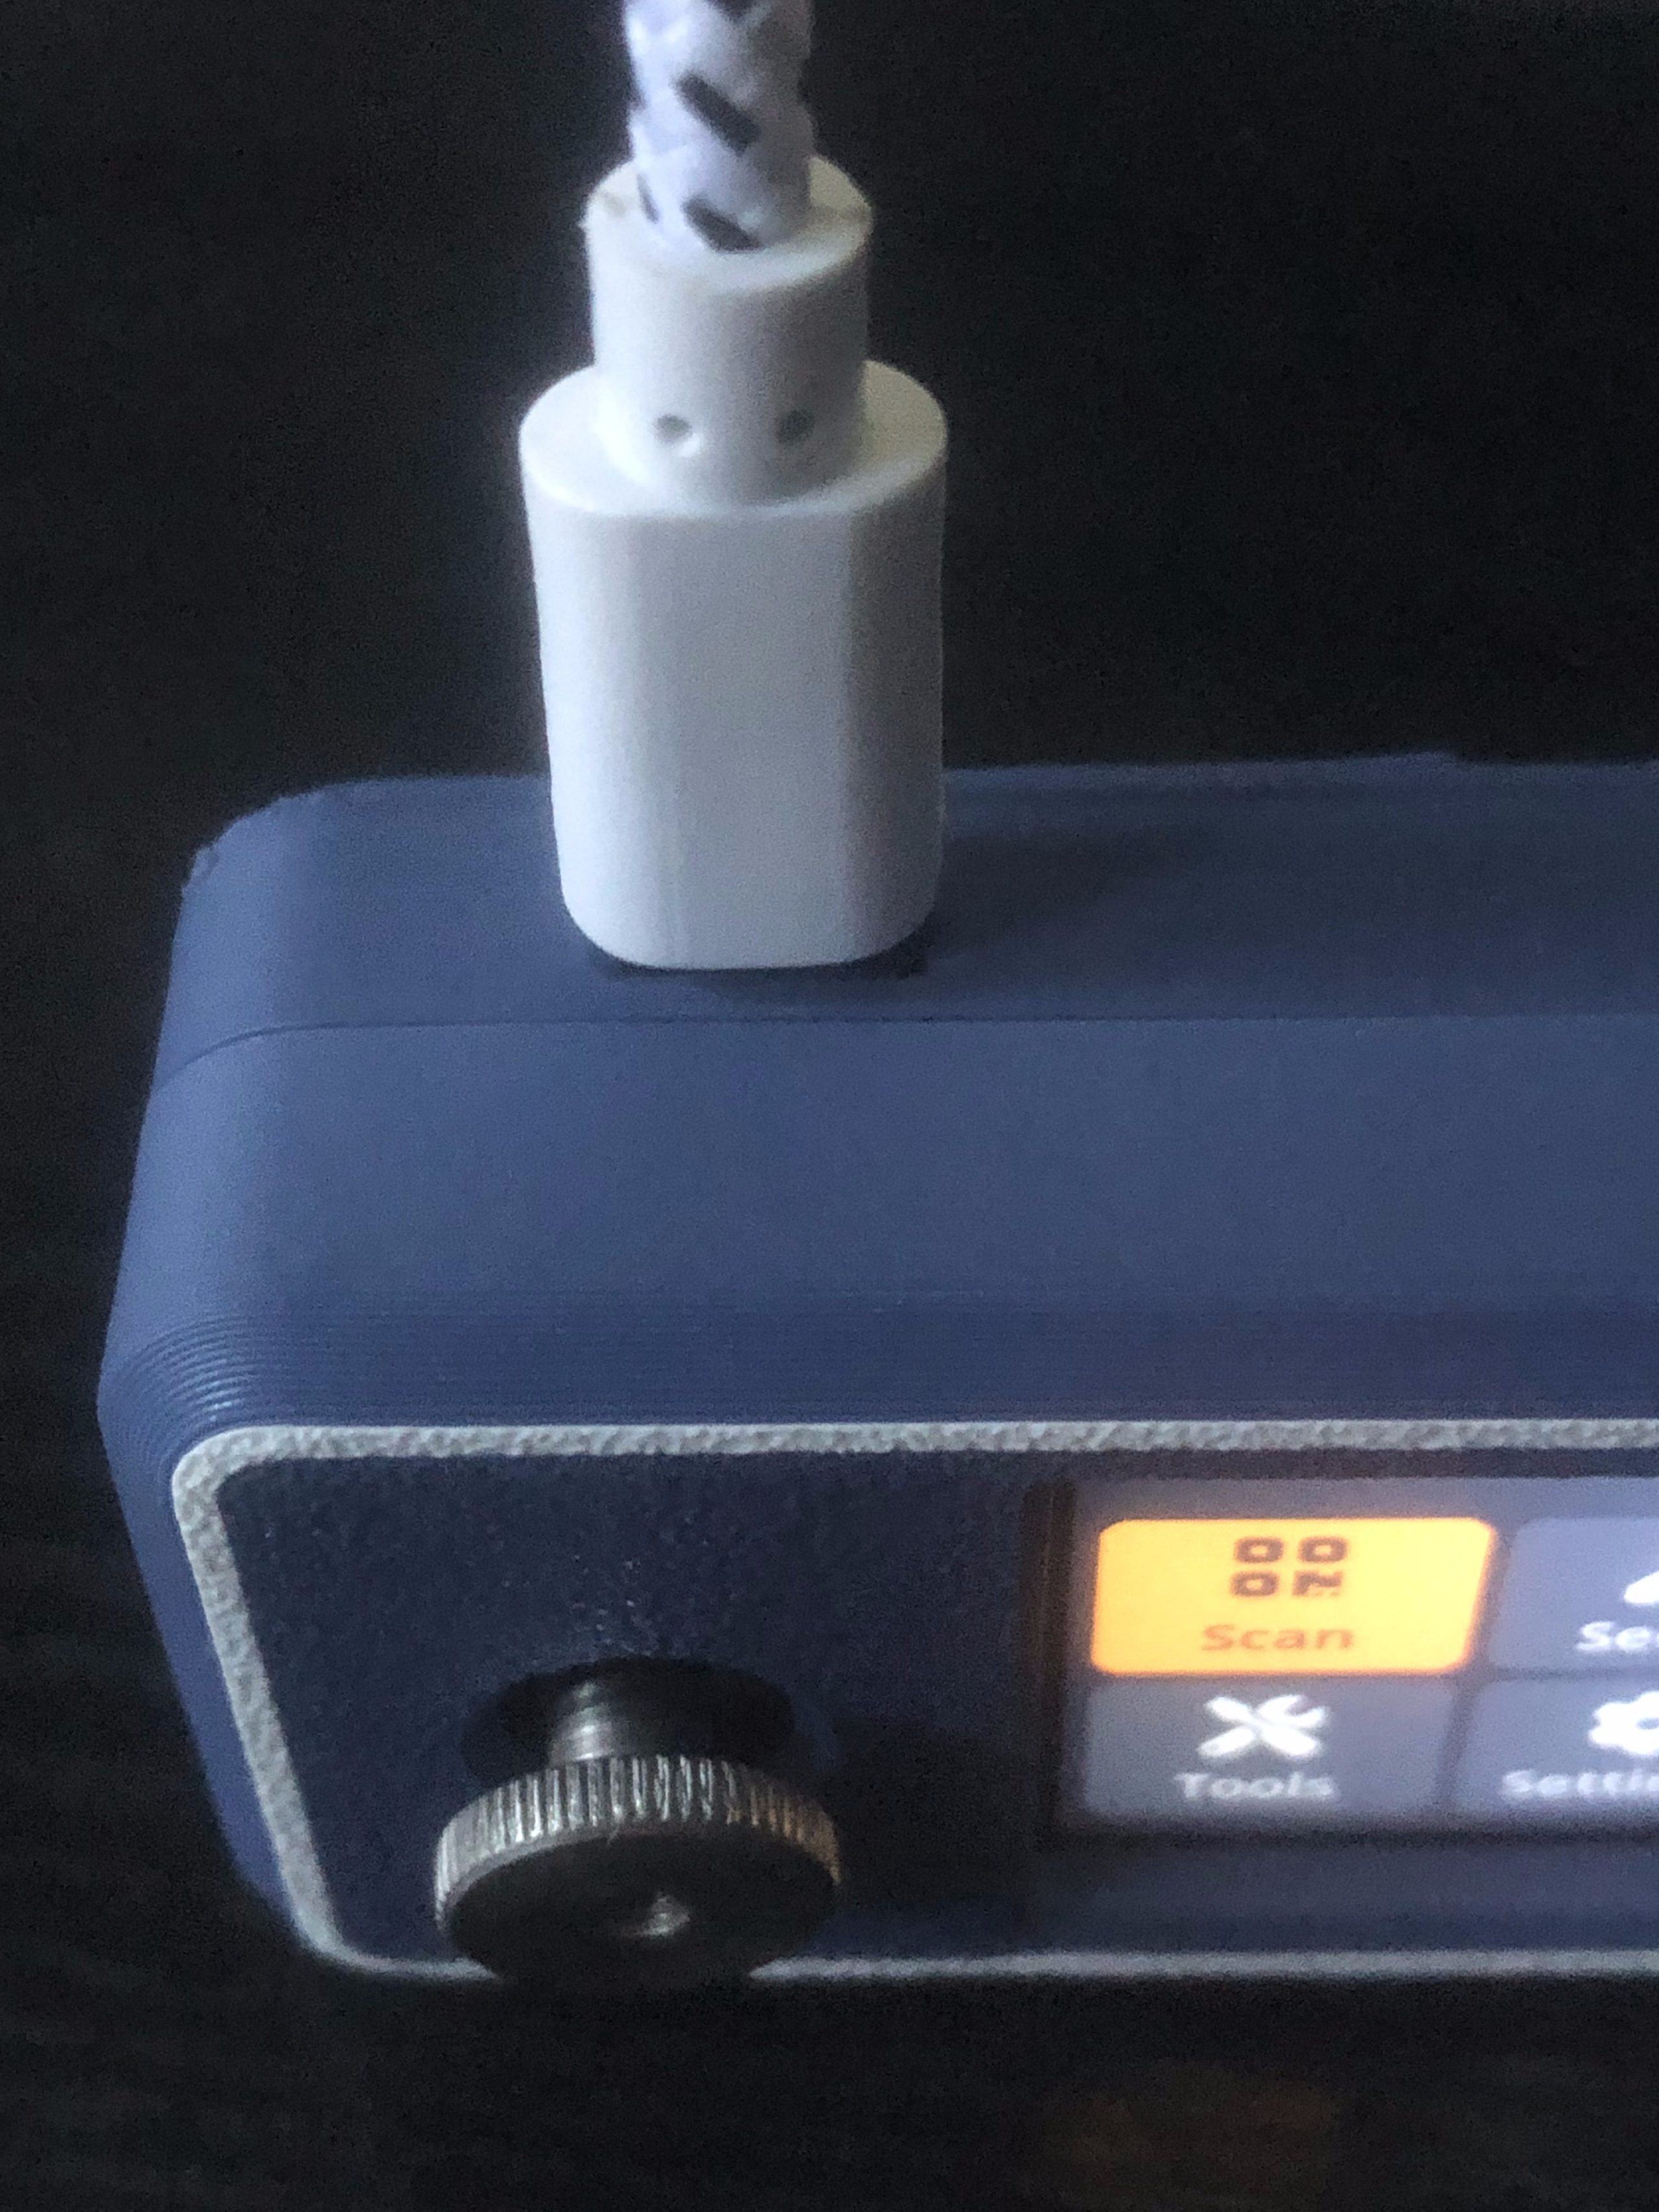
Power-Only USB
The whole point of the SeedSigner project was to create a secure air-gapped stateless Bitcoin wallet to protect the private keys. The device features no external connectivity other than a few USB ports (1-2 ports depending on which shell is used). While this sounds like it could pose a serious security risk, for example, accidentally plugging the device into a compromised computer, Seedsigner has considered this.
The leftmost USB port (the only available port on our shell) is power-only, meaning that even if you connect the device to an infected device, no data transfer is possible, rendering direct attacks impossible. This feature is hugely important for security-conscious individuals as it acts as another layer of protection against bad actors attempting to steal your funds.
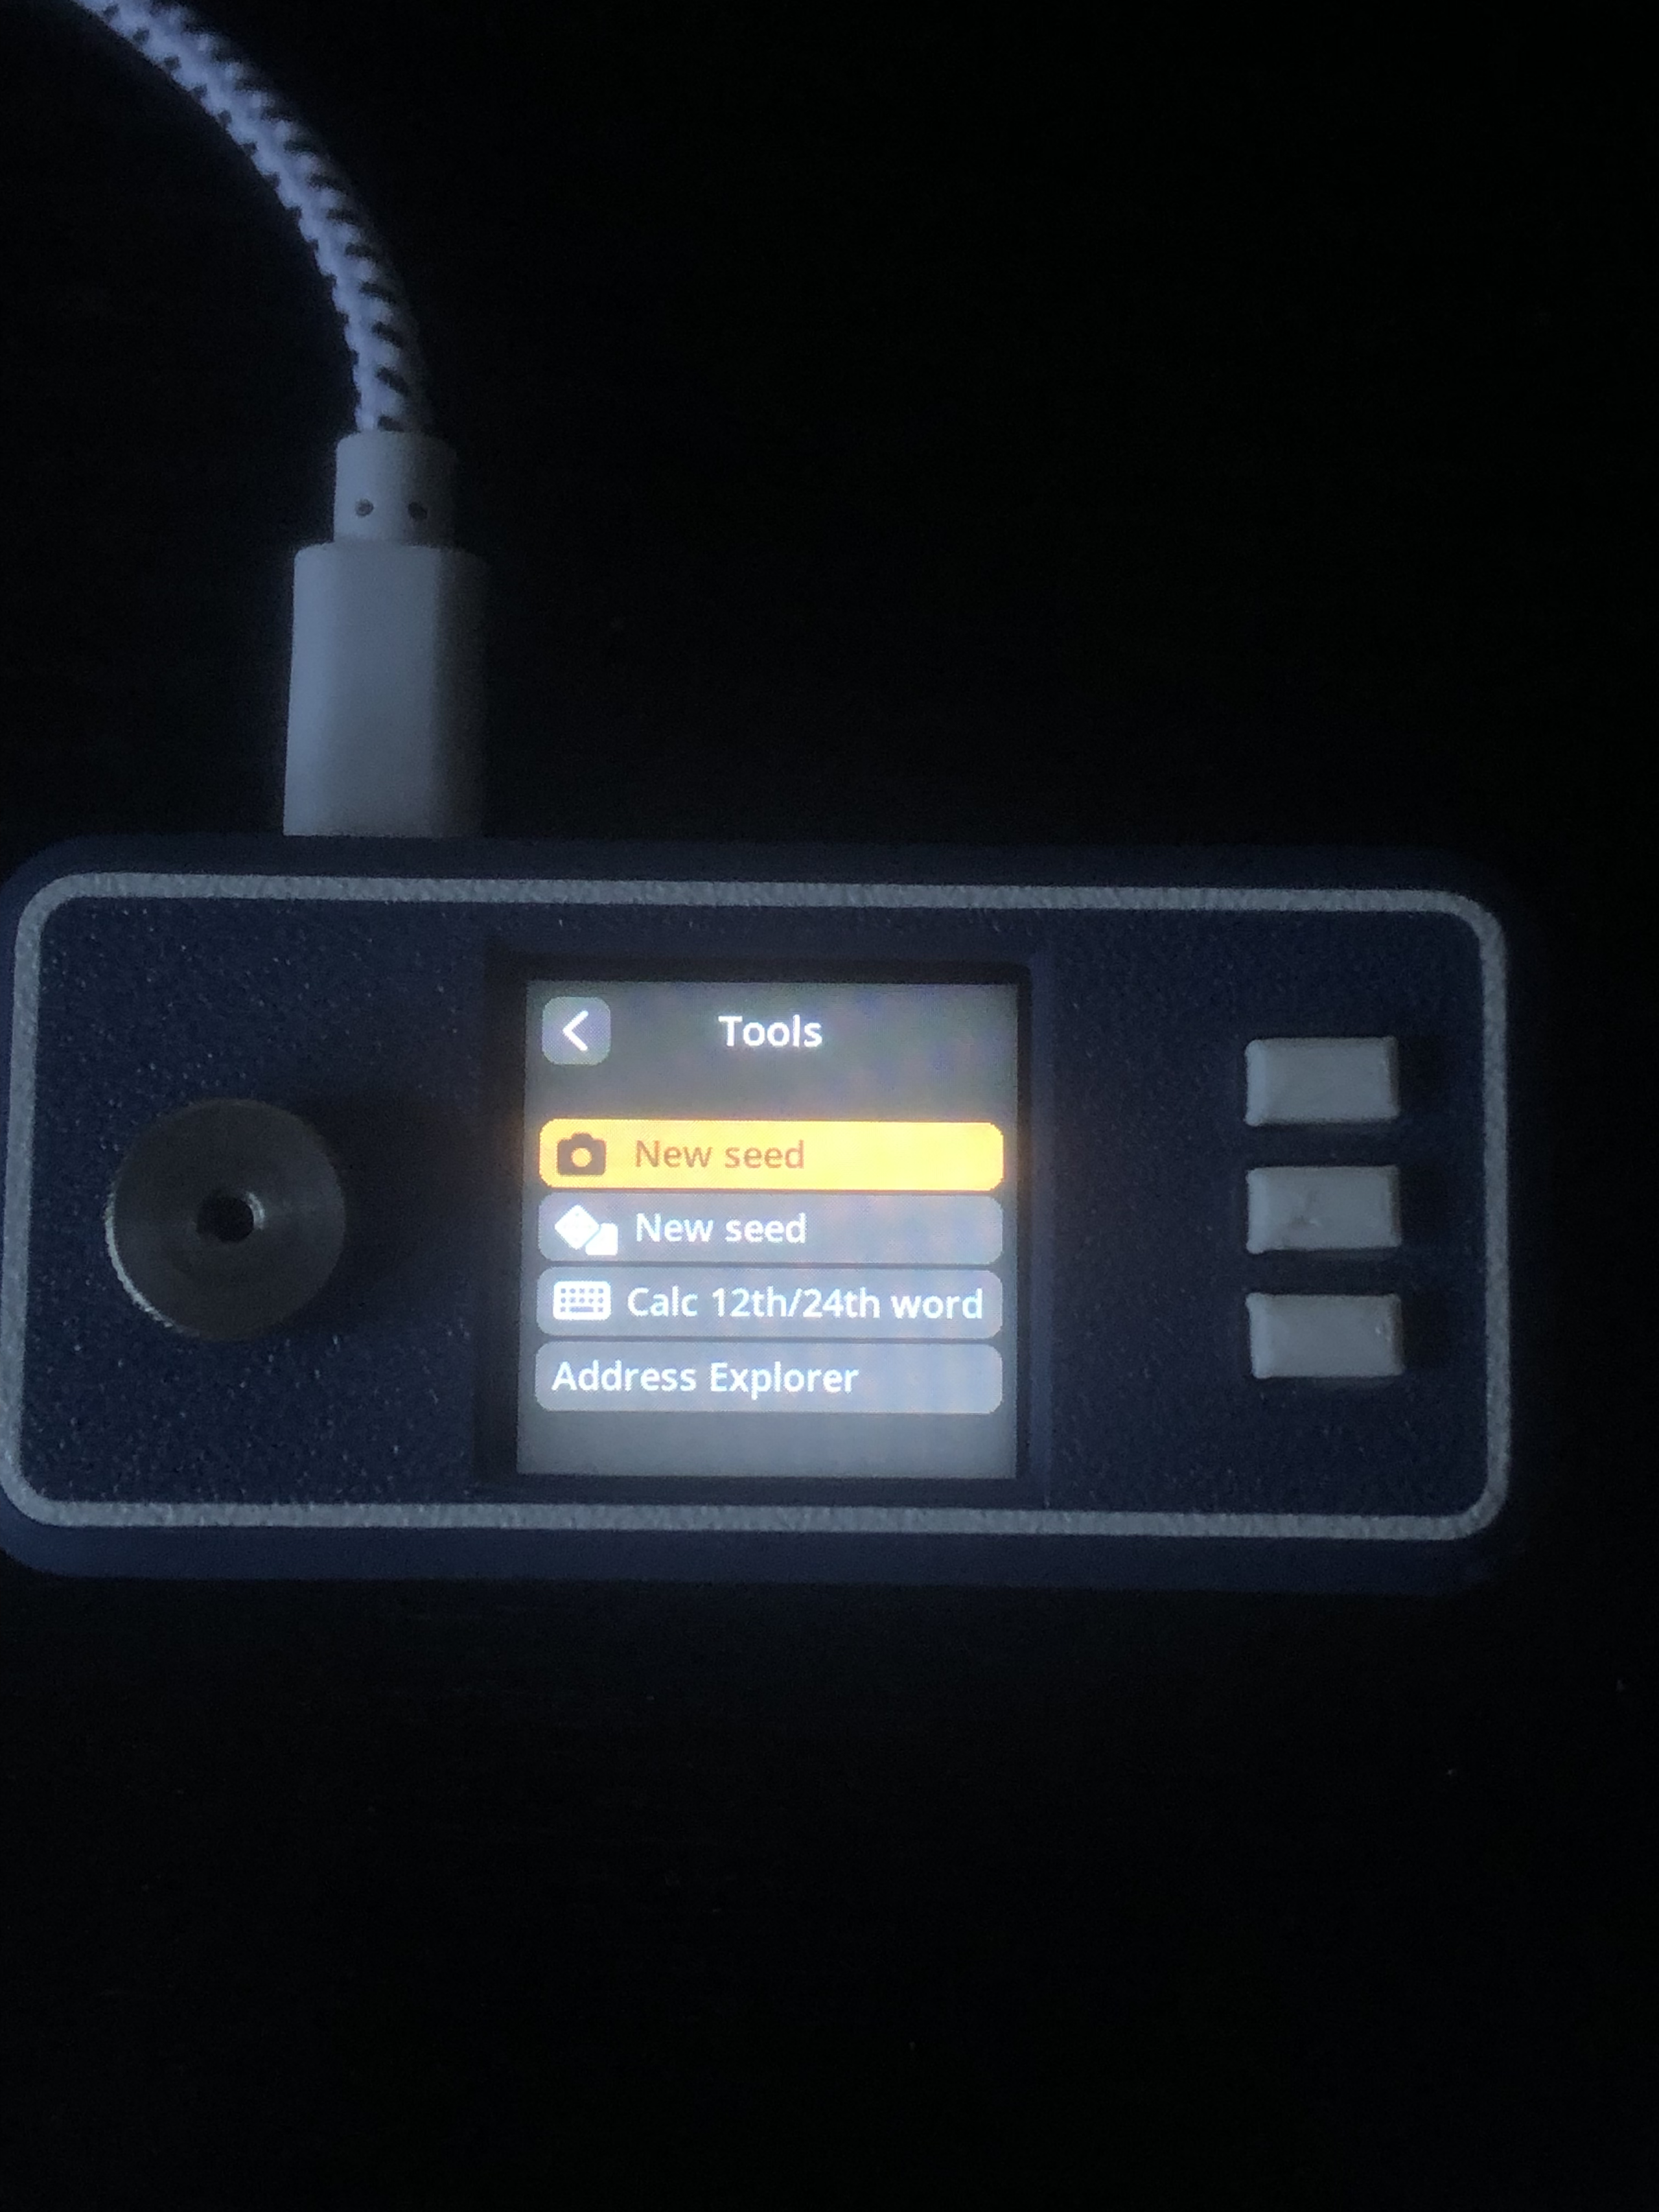
Custom Seed Generation
An intriguing feature of the SeedSigner is the ability to create randomized and unique Bitcoin wallets using images. As the device is equipped with a camera unit, you can take a picture and use it to generate your private key using the photo-to-seed tool. Because no two photos will be identical, using an image to create a key is extremely secure and highly randomized.
The one drawback to SeedSigner's approach is that you'll be required to manually create a QR code in addition to noting down your seed phrase. Although you can complete the process fairly quickly thanks to the in-built zoom mode, it's undeniably tedious and requires a good deal of attention to detail. Otherwise, you could easily fill in the QR code incorrectly, making it more challenging to recover your assets.
Supported Coins
The SeedSigner is billed as a Bitcoin multi-signature wallet and is designed only to support the storage of BTC. In theory, changes to the software could make it possible for the device to store multiple assets in the future with only a quick update. However, there do not currently seem to be any plans for implementing this change, rendering the device unsuitable for those looking to move their assets off an altcoin exchange.
Seedsigner Pricing
Because a SeedSigner is comprised of several components, pricing for the complete unit is liable to change based on location, vendor, and market conditions. However, we looked through the approved sellers on the SeedSigner website and found Vulcan to be the cheapest for the UK and EU at $92.79 for a complete device and shipping. For US customers, BTC Hardware Solutions is the cheapest at $80.
SeedSigner Pricing Compared
Although a SeedSigner is billed as a cheaper and more secure alternative to mainstream hardware wallets like a Trezor Model One, Ellipal, or the Arculus Wallet, the devices are quite comparable in cost. A Trezor One sells for $69, and you can buy a Ledger Nano S Plus for $79. Therefore, consider your options and personal requirements before purchasing a SeedSigner kit.
| Wallet Name | Price (USD) |
|---|---|
| Trezor Model One | $69 |
| Ledger Nano S Plus | $79 |
| SeedSigner | $80 to $93 |
Seedsigner Ease of Use
At its core, a SeedSigner is fairly easy to use. However, a fair few additional steps are required to begin sending and receiving Bitcoin compared to traditional hardware wallets, which can make the device less appealing to beginners looking for an easy way to improve their Bitcoin storage security.
First, you have to buy the required comments and physically build your stateless Bitcoin signing device. Thankfully, this process is fairly simple, but you'll still need an hour or two to familiarize yourself with the technology and understand how the SeedSigner works, how it's built, and how it connects to the Bitcoin network.
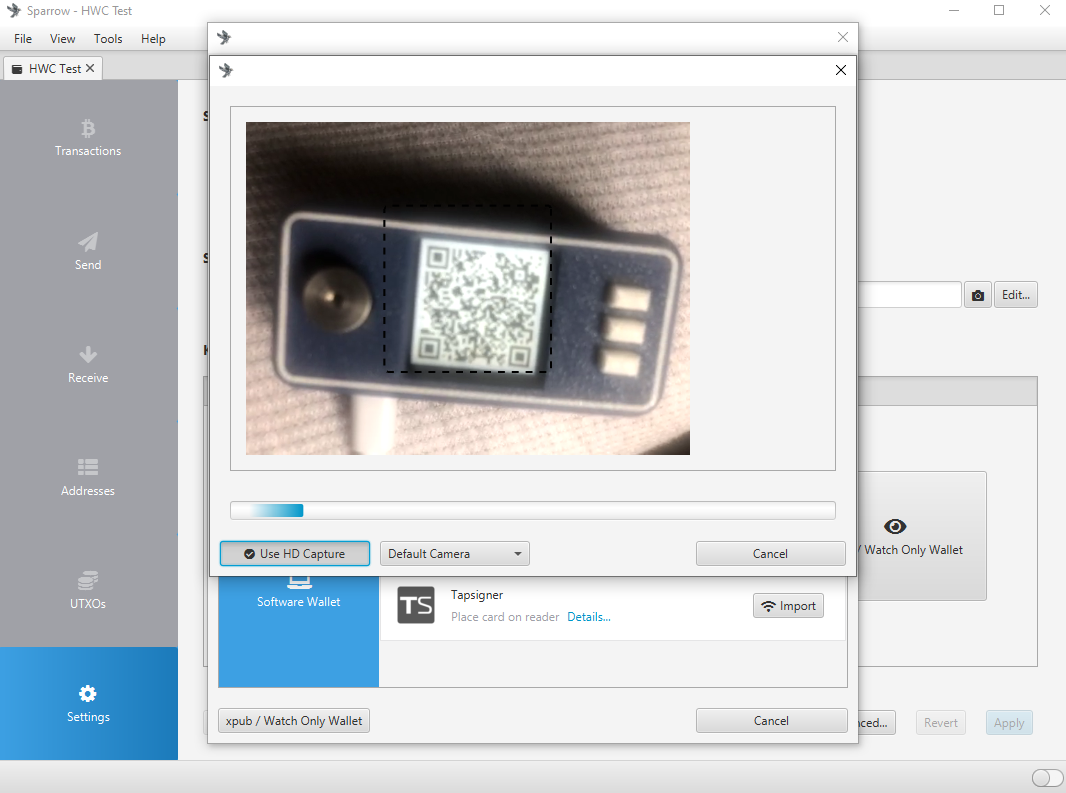
To use a SeedSigner to send and receive transactions, you'll need to link it to a wallet coordinator like Specter Desktop, Sparrow Wallet, Nunchuk, or BlueWallet. Connecting a wallet is simple; use the export xPUB data option on SeedSigner and scan the animated QR codes. Afterward, you can use the wallet coordinator software to send and receive Bitcoin transactions.
After thoroughly testing the device for our Seedsigner review, we found it to be mostly easy to use but require some less common technical knowledge. Thankfully, the device is simple to use once you familiarize yourself with its inner workings, making it accessible to anyone willing to do a few hours of research. However, it is not ideal for beginners looking for an easy Bitcoin wallet.
How To Build A SeedSigner
1. Obtain the required parts
A Seedsigner can be created with as little as four parts and a casing to house them in. Furthermore, all the parts can be purchased together from one of the retailers listed on the SeedSigner website. As such, the build process is simple and well within the reach of the average crypto investor.
The required parts to build a Seedsigner include:
- Raspberry PI Zero Version 1.3)
- WaveShare 1.3 Inch LCD Hat
- Raspberry PI Zero-Compatible Camera Unit
- MicroSD Card with at least 4GB Storage
- Shell/Casing (Used to house components but technically functional without)
After you have acquired all of the parts, you must begin the assembly of the Bitcoin signing device.
2. Download and flash SeedSigner software
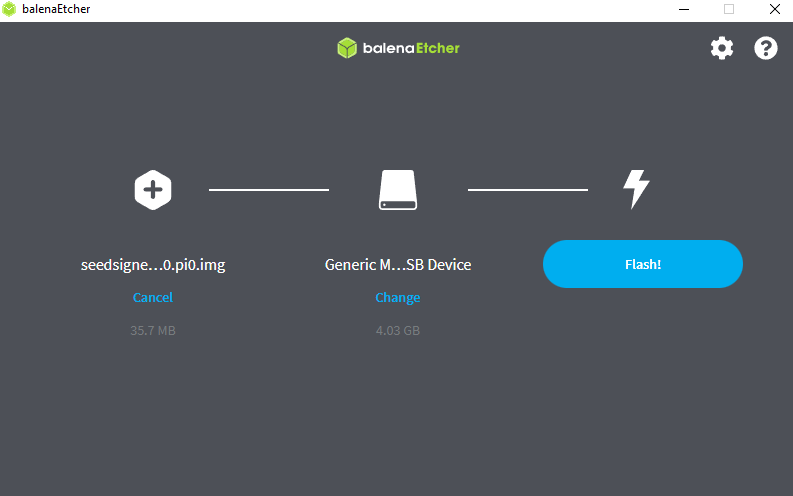
First, you must prepare the SeedSigner software and flash it to your SD Card. This process is simple and takes only a couple of minutes to complete. Head to the SeedSigner website and download the relevant .img file; it should have the name of your Raspberry PI in the filename. For example, ours was called ‘seedsigner_os.0.6.0.pi0'.
To flash the file to your SD card, you'll need the free BalenaEtcher software. Once downloaded and installed, open BalenaEtcher, select the SeedSigner .img file, find your SD card, and press ‘Flash.' Once the file has been flashed to the SD card, the software will notify you, and you're ready to move on to the next step.
3. Insert MicroSD card
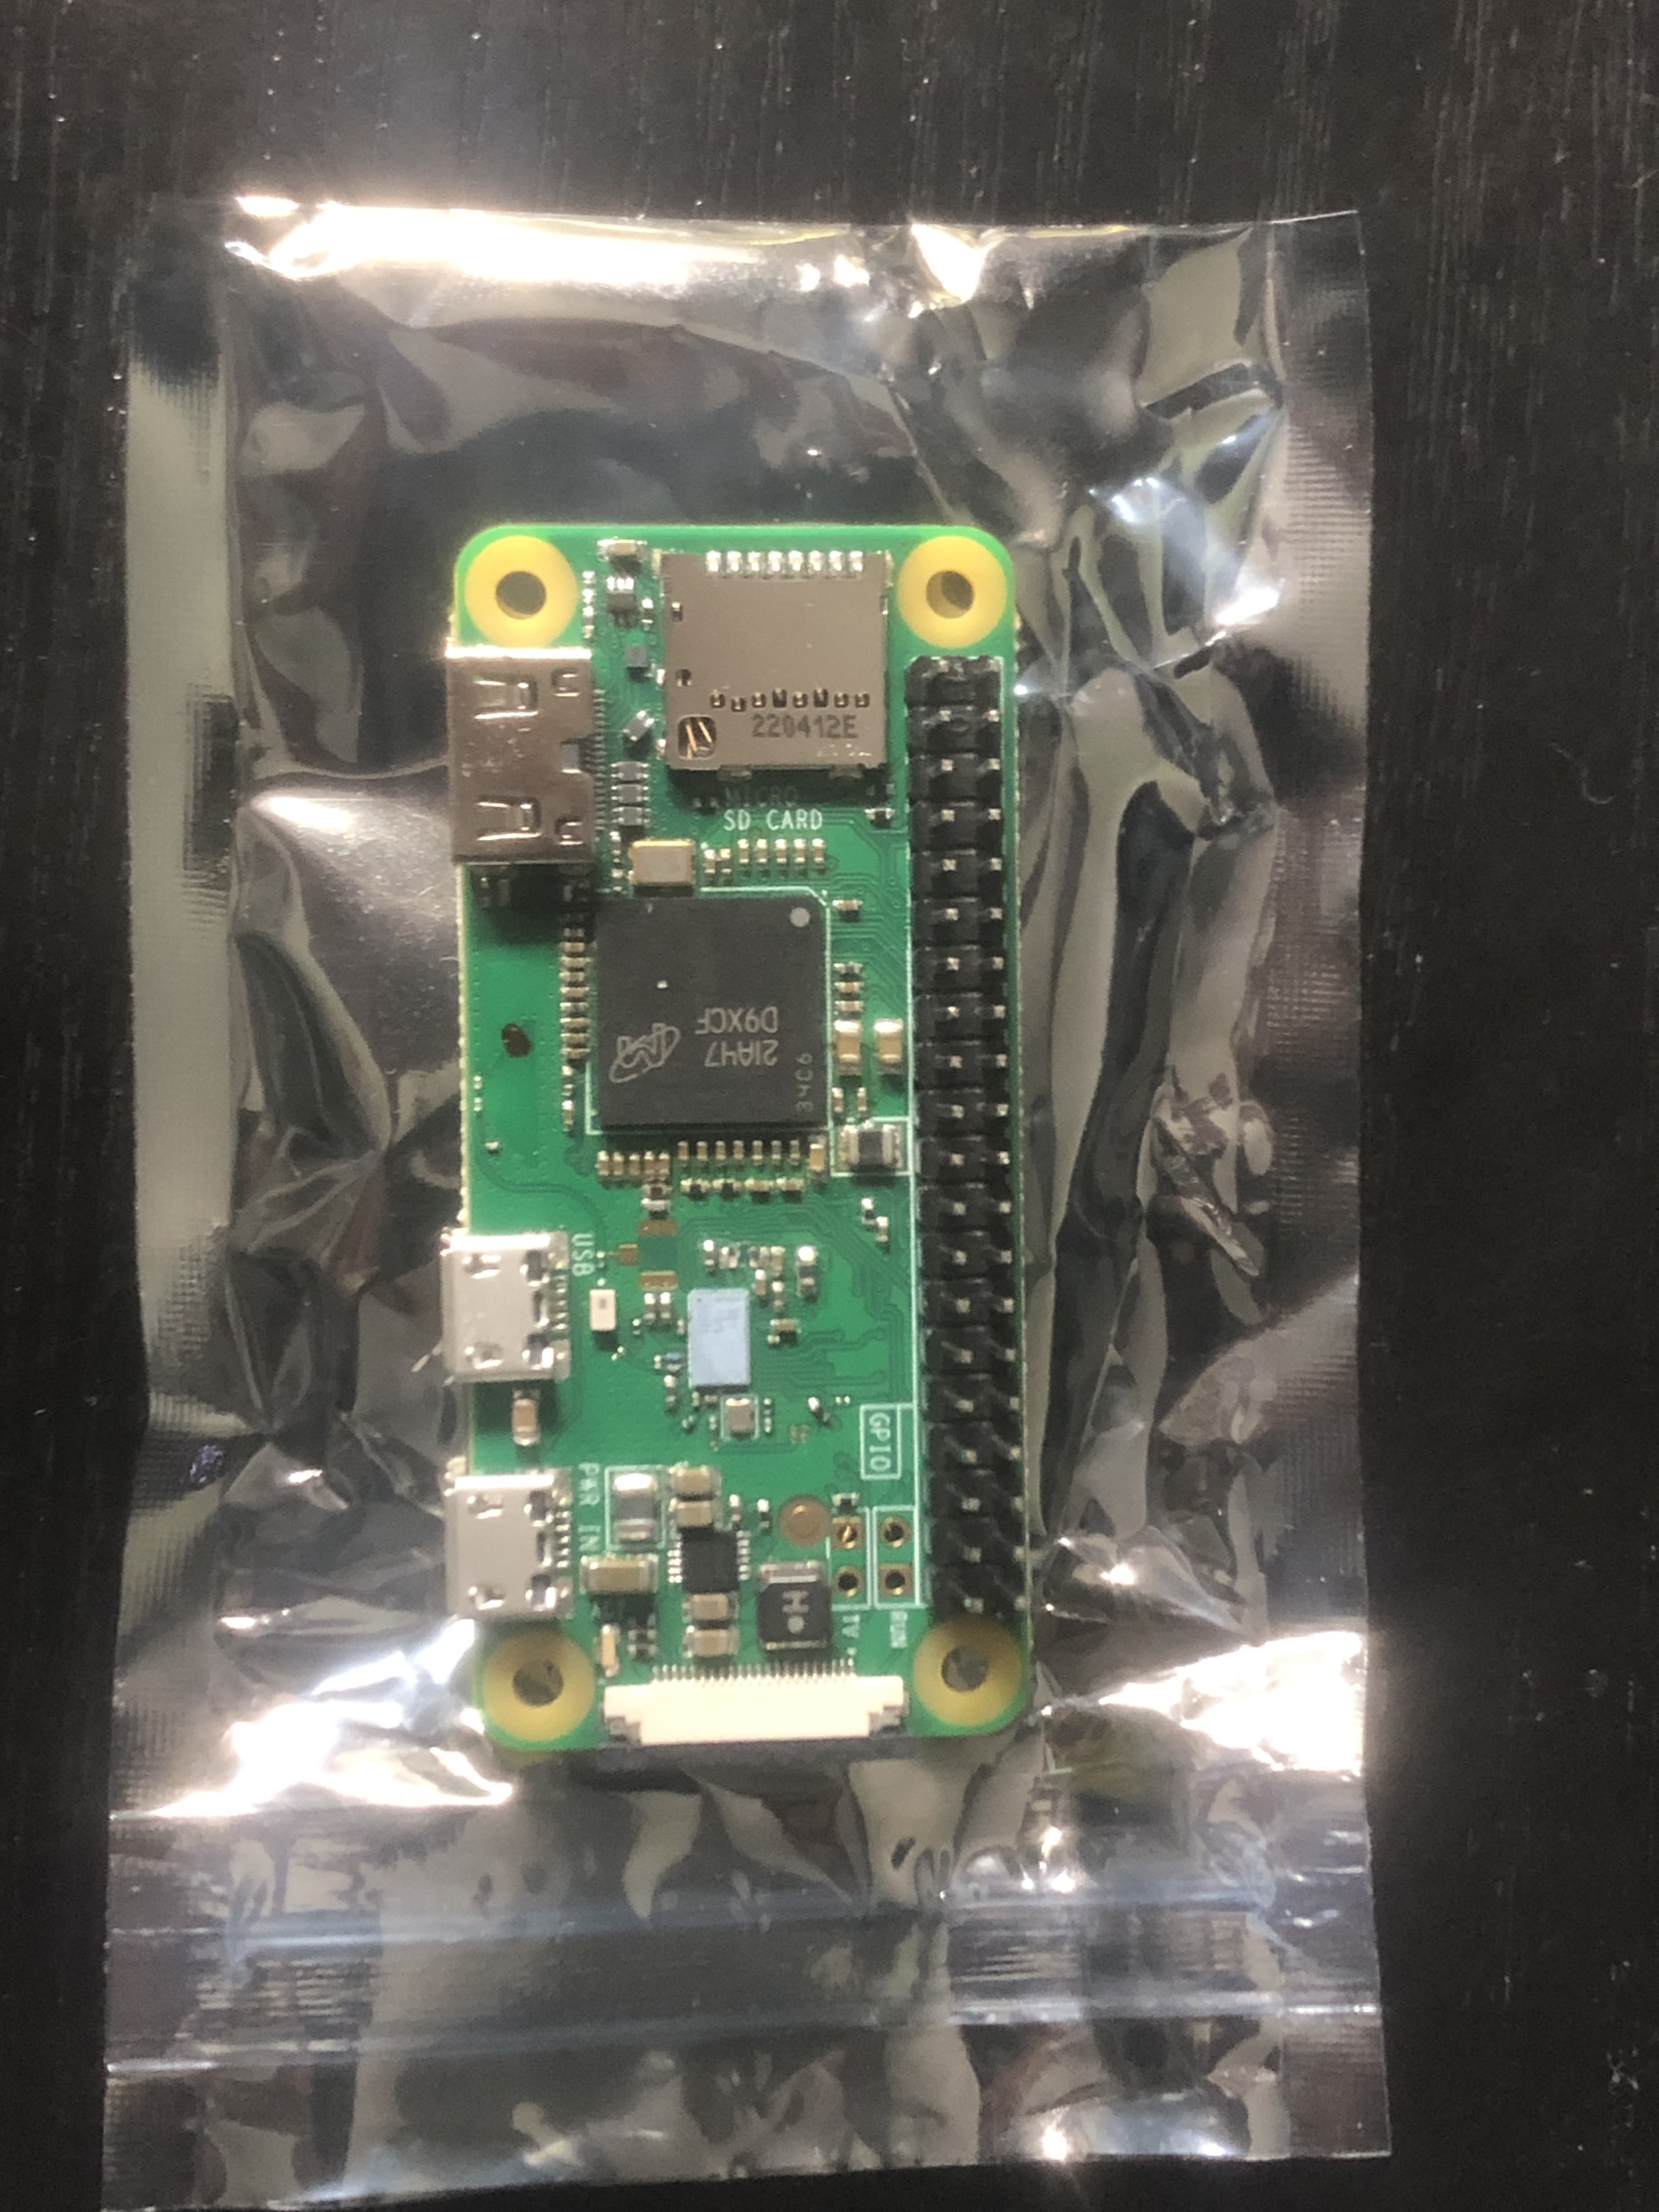
After flashing the SeedSigner software, you need to install the SD card into your Raspberry PI. During installation, we recommend keeping your Raspberry PI on top of its anti-static packaging to ensure it doesn't get fried accidentally.
The SD card slot is on the device's left, next to the Mini HDMI port. To install the SD card, push it into the slot with the gold pins facing down.
4. Install the camera module
Next, you'll need to install the Camera module. Before inserting the cable, open the black pull tab on the rightmost slot. Afterward, press the camera unit into the slot with the pins facing down and close the tab. After testing, you'll need to bend the camera ribbon cable under the Raspberry PI and align the camera with the hole in the shell, securing the ribbon cable using the included sticky tab.
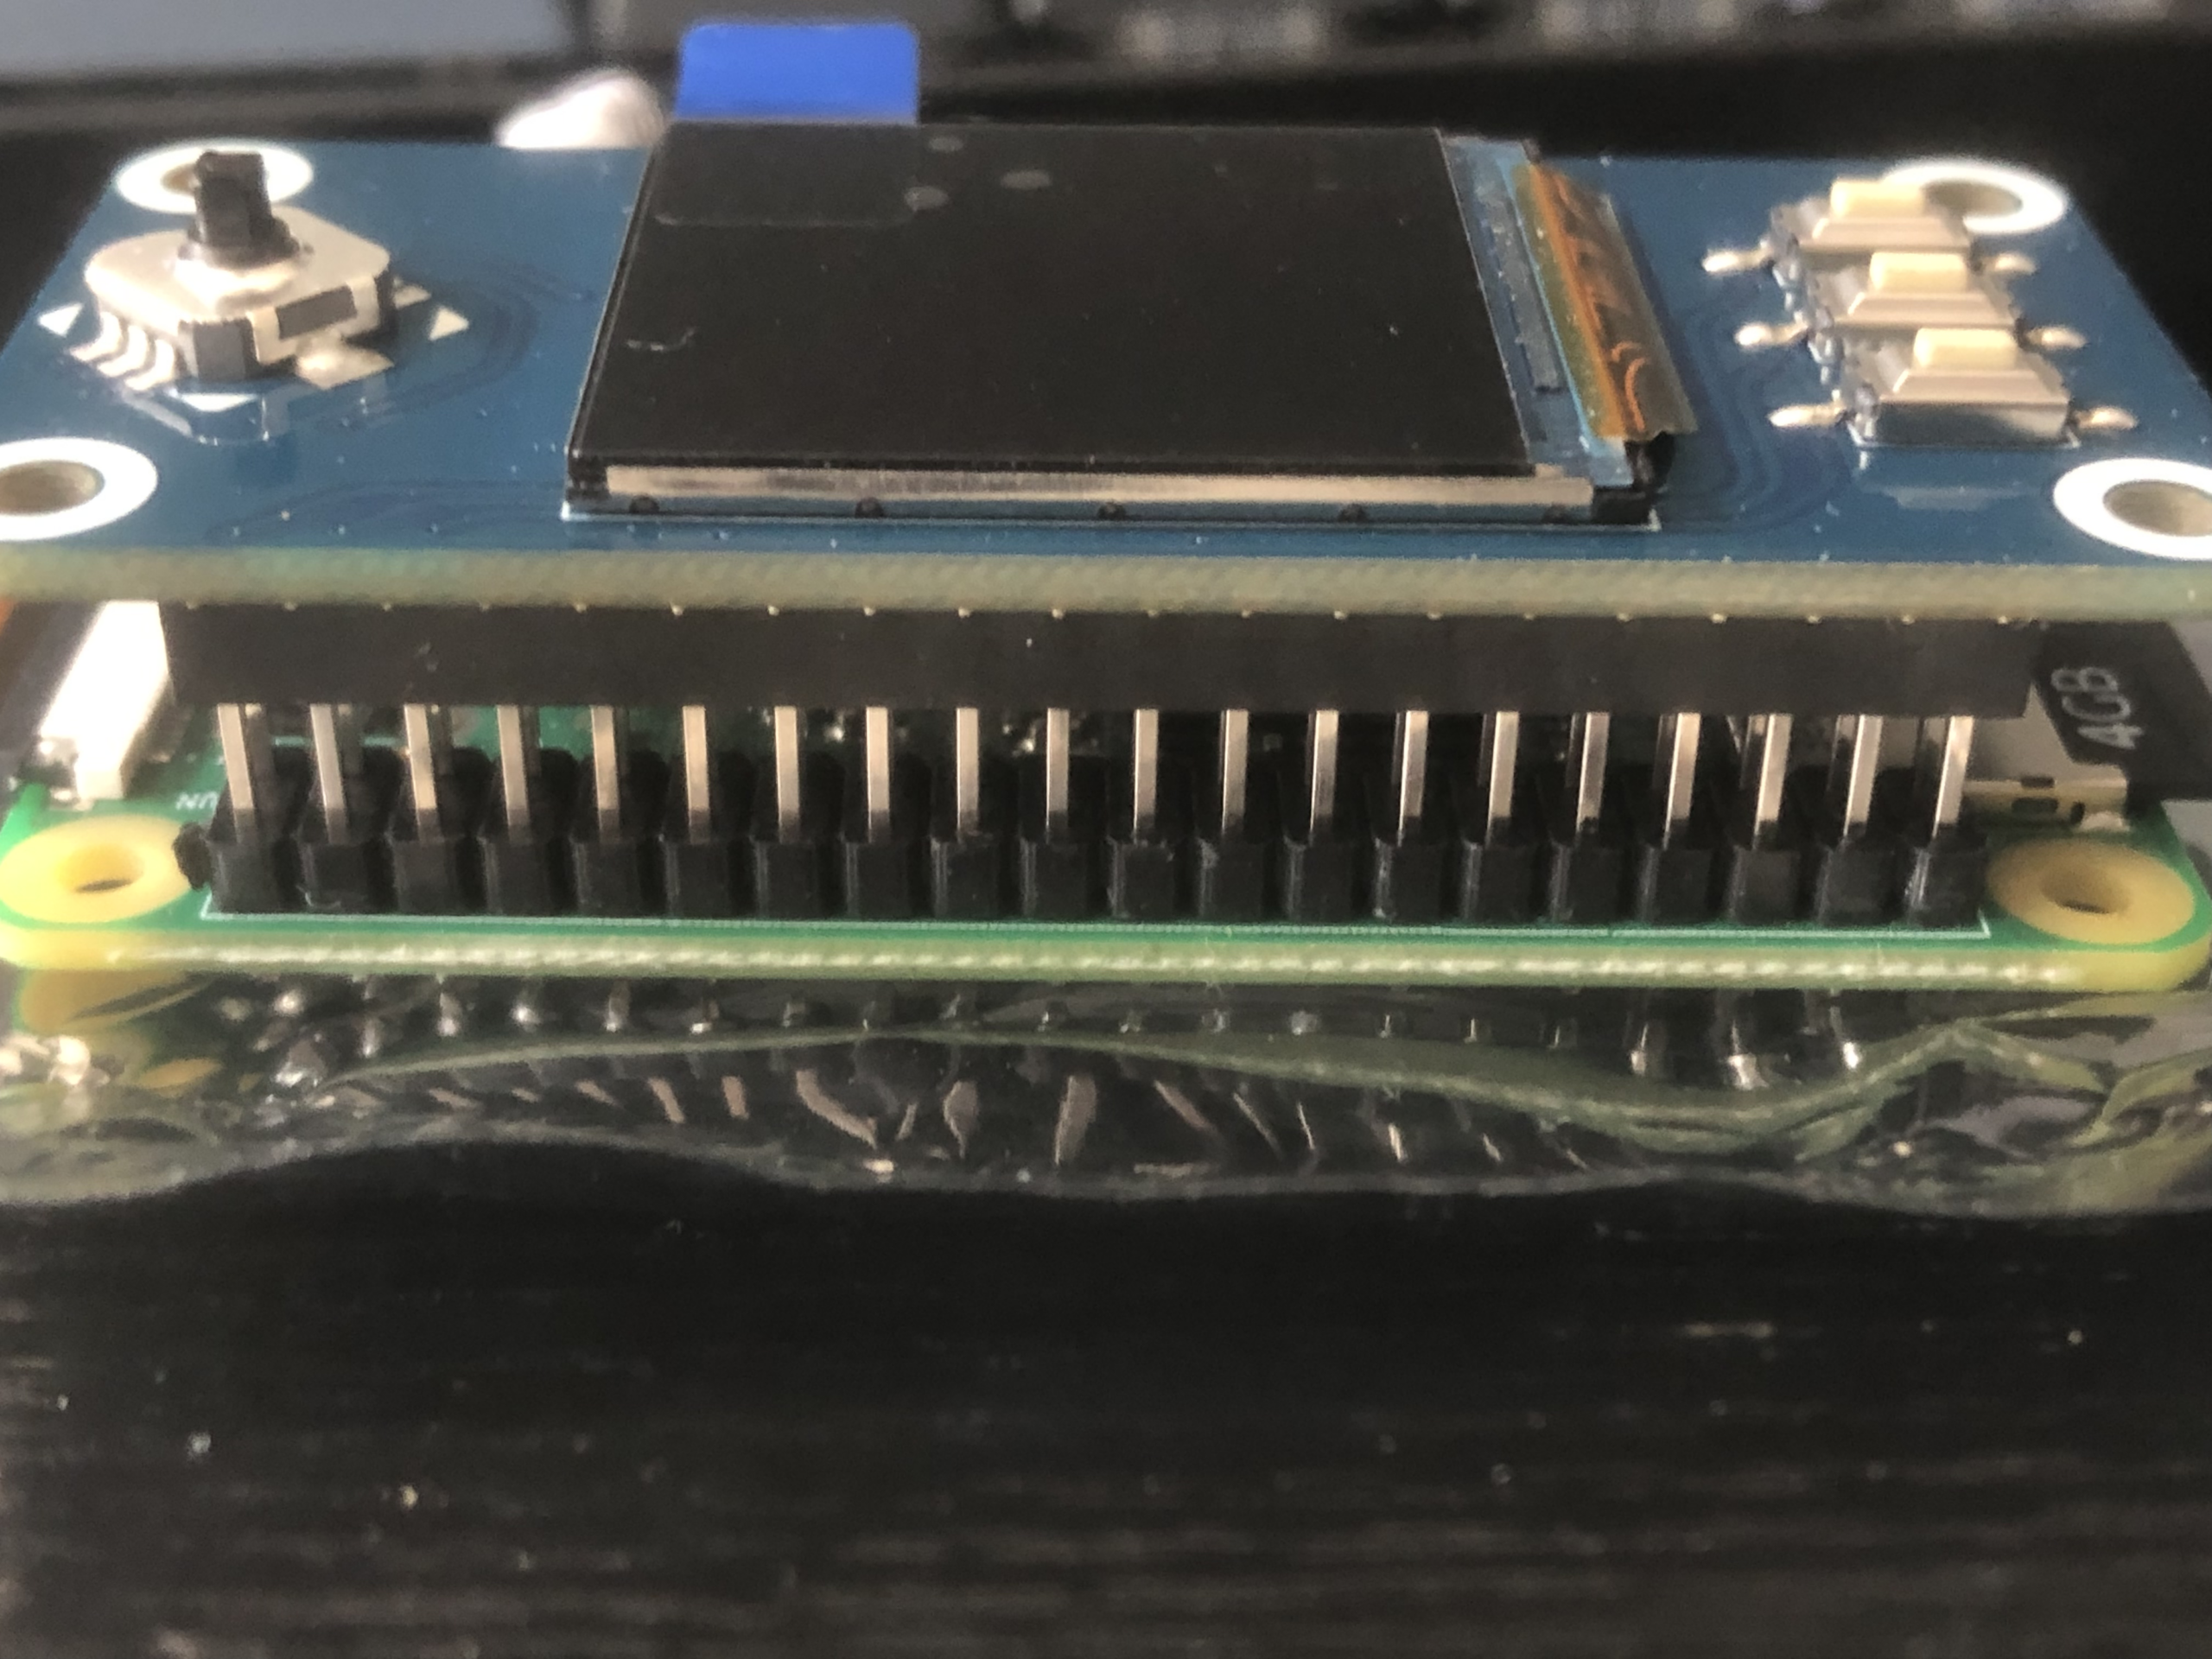
5. Connect the LCD display
To connect the LCD display, align the pins on the Raspberry PI to the holes on the camera unit and gently but firmly insert the display. After this step, it's advisable to test the device. To do so, plug in the USB power cable, and wait around 30 to 60 seconds. If the SeedSigner logo appears, you're good to go.
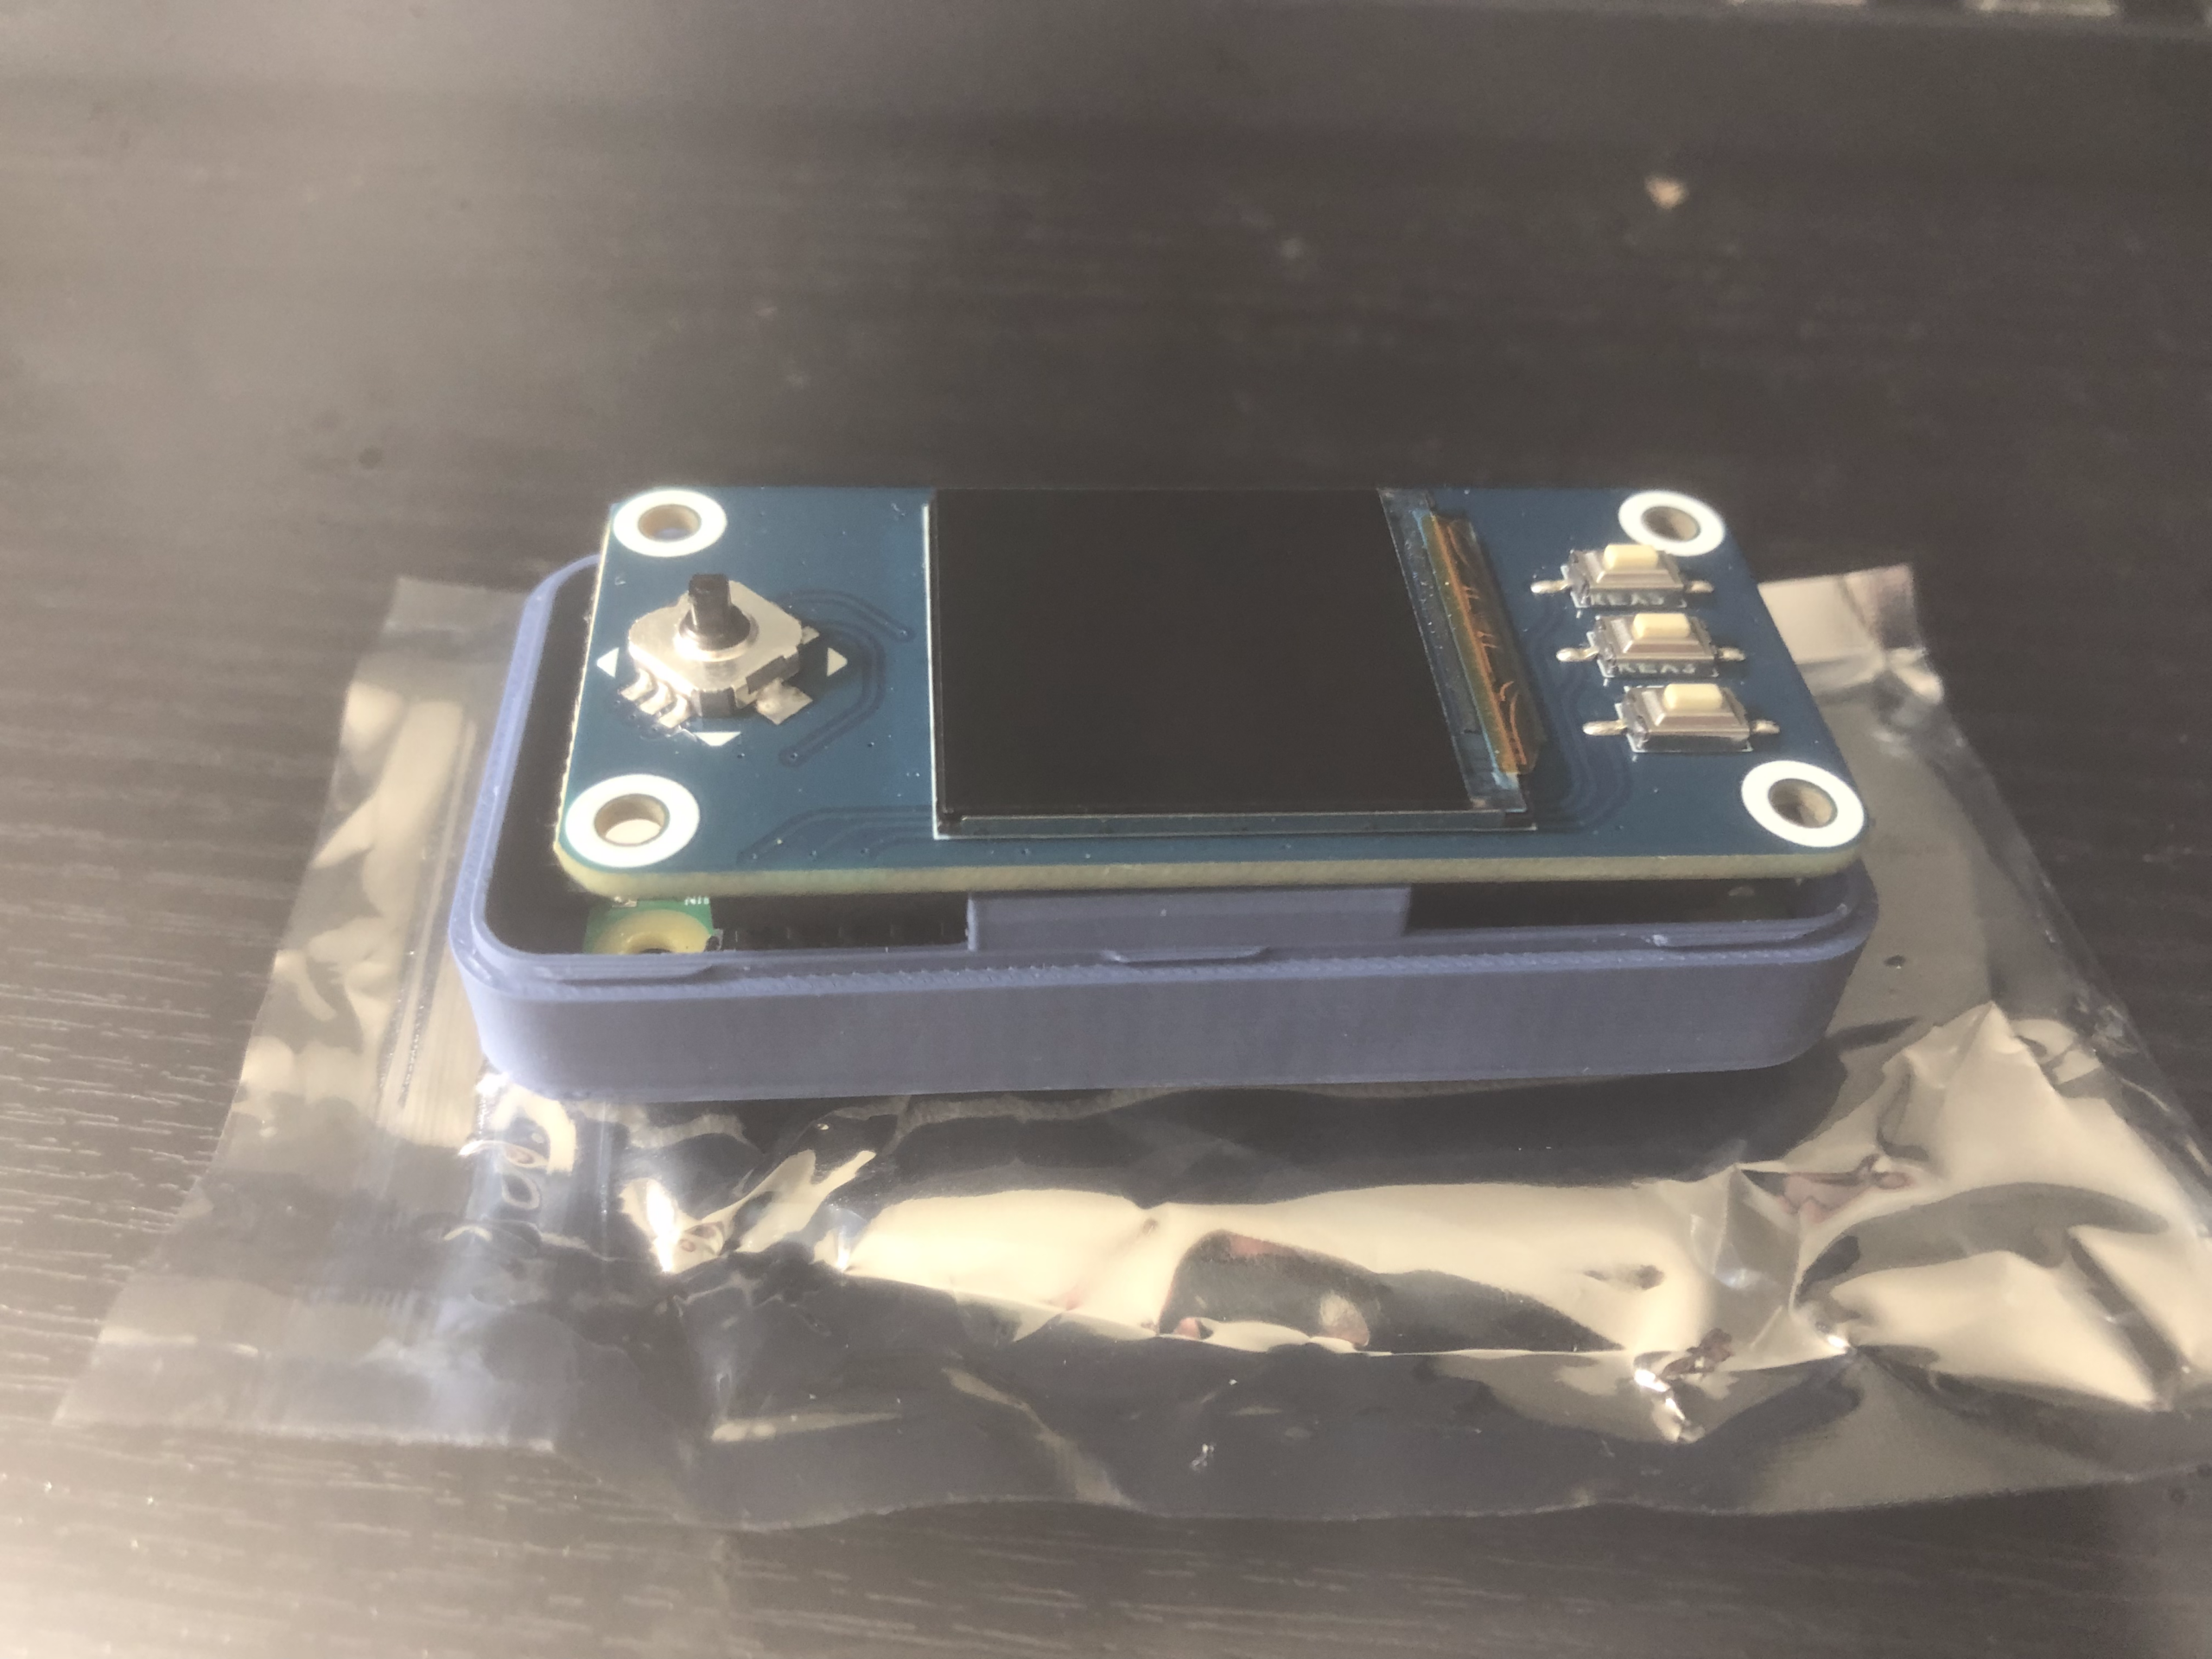
6. Install hardware components into shell
Once you've tested the device, take off the LCD screen and align the camera unit with the hole in the shell. Then, install the Raspberry PI by slotting it into the case one side at a time, starting with the USB slot. Then, connect the LCD like before, place the buttons for keys 1 to 3 in the faceplate, and lower it onto the rest of the casing. Afterward, screw in the joystick button, and you're ready.
7. Test device and generate wallet
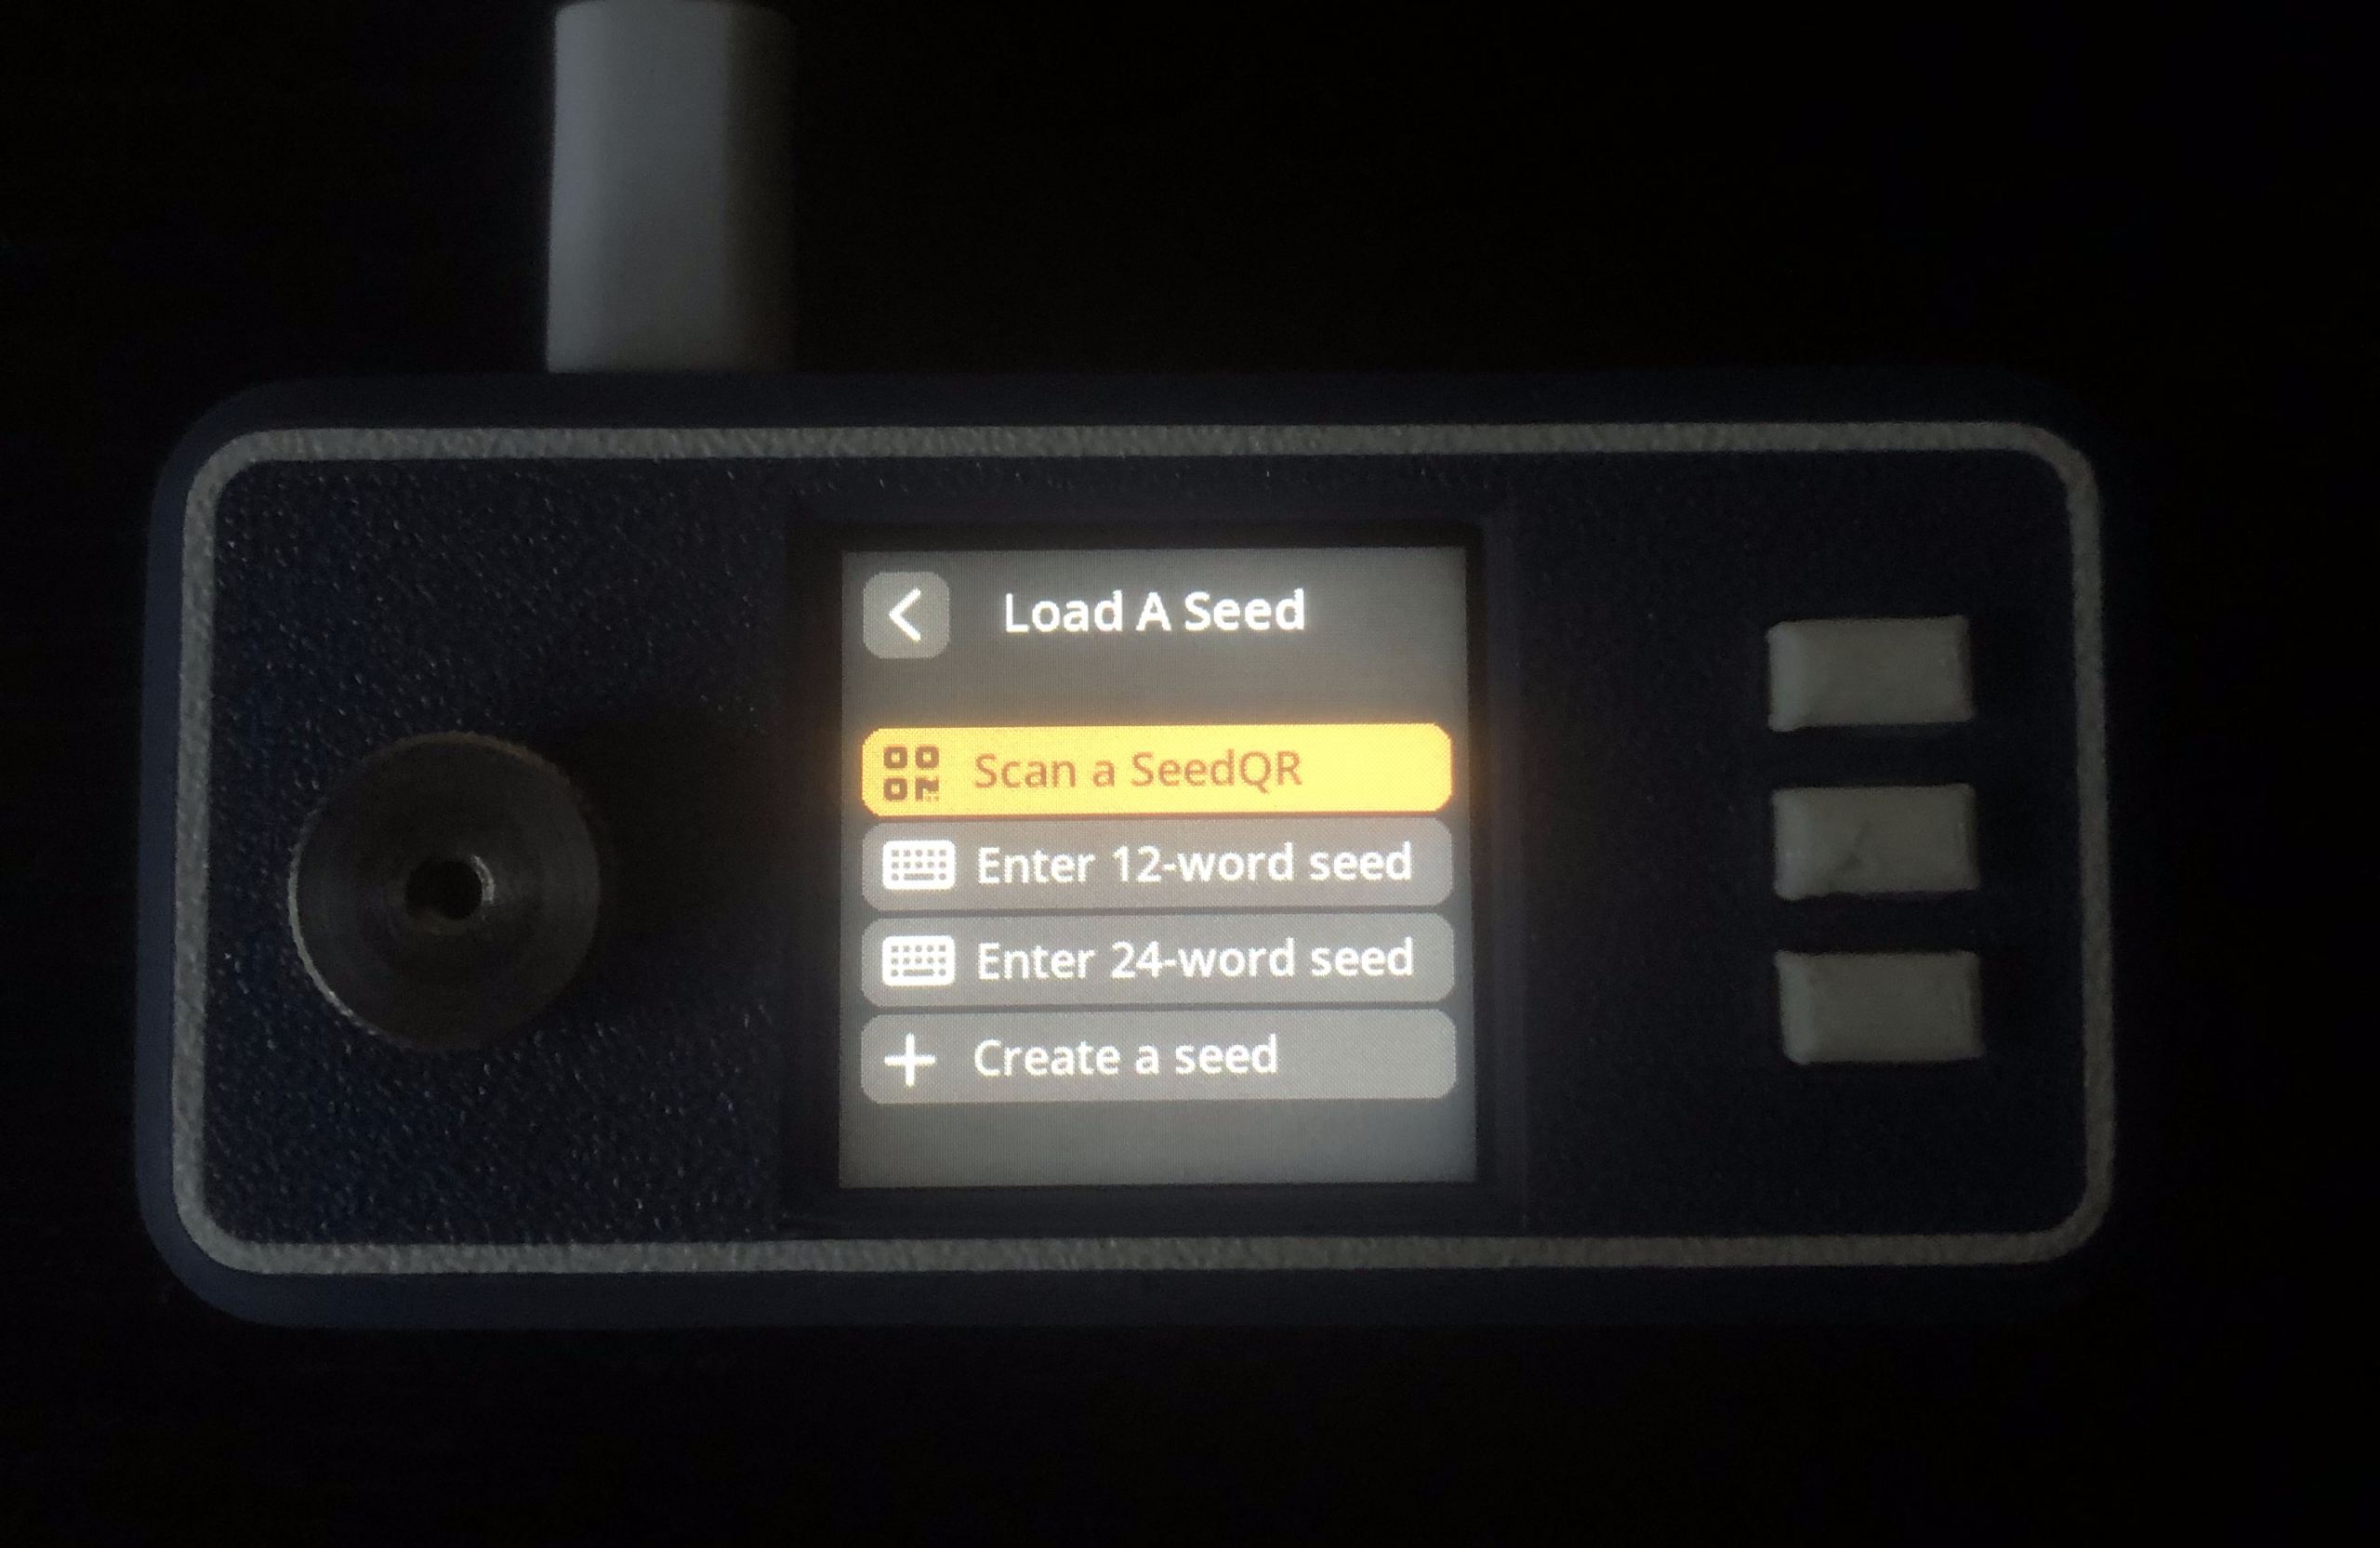
Now that your SeedSigner device is complete, you can generate a wallet. To do this, plug in the SeedSigner, select ‘Seeds,' and enter a seed phrase or choose ‘Create a Seed.' The device supports generating a seed using dice rolls or via digital photo. Once you've created and stored your seed phrase, you can link the device to a wallet coordinator.
SeedSigner Support
While no live chat or phone support is available, you can contact the SeedSigner team via email, GitHub, Twitter, Youtube, or Telegram. Additionally, many video guides are available on the main SeedSigner website on topics like building the device and setting up the software.
Jay Leonard
Jay has been providing commentary on the cryptocurrency market and offering readers guidance for over three years. While primarily focused on fundamental analysis and what institutional adoption means for the industry, Jay also has experience with technical analysis, actively trading and investing in a wide range of assets.